Radius NX 12x8
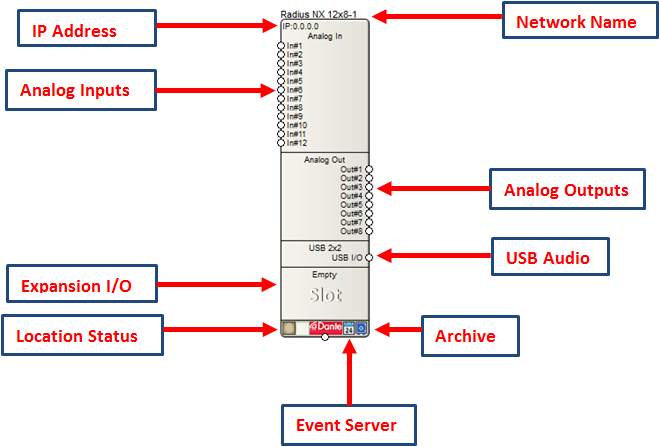
Note: Network I/O can be shown on the unit module by either selecting the 'Show Network I/O' option in the right-click menu or checking the same option in the unit properties dialog. Network I/O cannot be shown if the Dante card is not installed in the unit as configured below. Similarly, USB I/O will only be shown if the unit is configured with USB functionality.
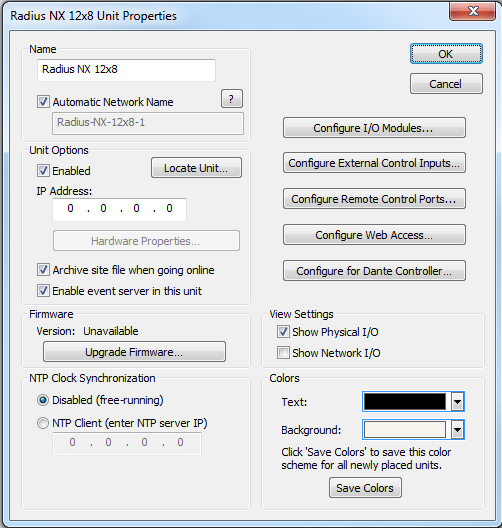
All of the following features, except for the Location Status, are managed in the Unit Properties dialog. To access the Unit Properties, right-click on the unit module in the Site View and choose “Unit Properties...”
-
Name - It is recommended to assign a unique unit name for each unit in the design based on the unit's purpose or location. Composer will always append a unique numeric identifier to this name.
-
Network Name - When Automatic Network Name is checked, the network name is auto-generated from the unit name. Network names cannot contain special characters or spaces and must be unique.
-
Enabled - When the enabled box is checked, the unit must be physically present on the network for a Push of the site file to the hardware. When the enabled box is unchecked, a X will appear on the unit module in the Site View, and the unit will not be required to be physically present for the Push of the site file.
-
IP Address - If the unit is assigned to a static IP address, it can entered in the IP Address field and if the unit can located on the network at this address, a green check indicating the unit has been located should appear in the lower left corner of the unit module on the Site View. If the unit’s IP address is unknown, run the location process and the IP address field will be filled in once the unit has located and link to the unit module on the Site View.
-
Hardware Properties...- When the unit is located, this button opens the Hardware Properties dialog. More on this dialog can be found here.
-
Archive site file when going online - If this box is checked, this unit will receive an archived version of the Site File for later retrieval. Multiple units can receive the archived Site File for additional security should a hardware failure occur. It should be noted that archiving the site file into multiple Composer hardware units will increase Push time significantly. Symetrix recommends turning this feature on for multiple units during the final commissioning stage.
NOTE: Composer will try and enforce an archiving unit if no unit in the site file has this option enabled.
-
Enable event server in this unit- If this box is checked, this unit will act as the event server for all events that have been setup in Event Scheduler.
-
Upgrade Firmware...- Opens the Upgrade Firmware/Hardware Settings dialog.
-
NTP Clock Synchronization - The unit’s internal clock has two modes of operation: Disabled means the unit’s clock is free running and internally derived. NTP Client allows the unit to sync to an NTP server and receive network time.
-
Configure I/O Modules...- Clicking this button brings up the Configure Radius NX I/O Modules dialog where the USB module can be changed, the card type installed into the expansion slot may be specified, and the Audio Networking Card can be selected. If you design with a certain configuration often, you canSave Module Configuration as Defaultso that any new units dropped into a Site File will contain your preferred I/O module configuration. If the hardware has already been located, you canSync to Hardware.
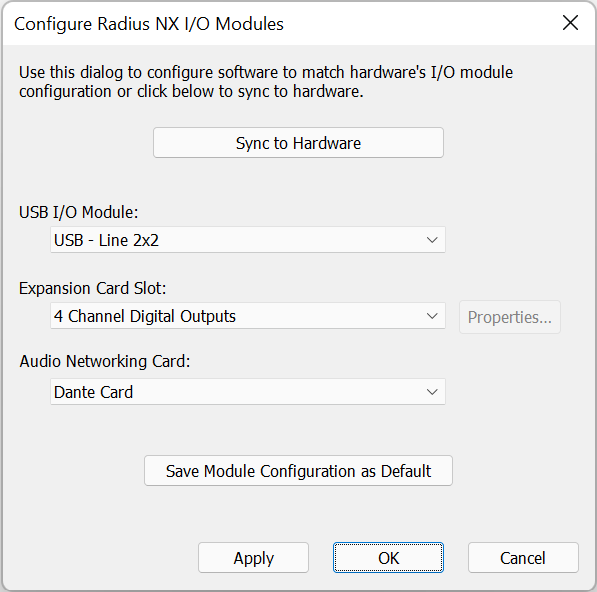
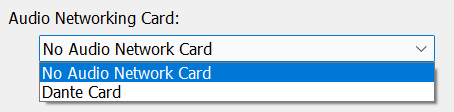
If the device does not have a Dante Card, "No Audio Networking Card" should be chosen. No Dante functionality will be accessible for this device throughout Composer.
If the Radius NX unit is not configured with the optional USB B streaming functionality, then "Not Installed" should be chosen. No USB B streaming functionality will be accessible for this device throughout Composer. USB A Recording and Playback modules are still available.
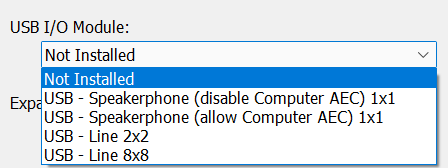 The USB input and output modules are identical to those described for the USB Card.
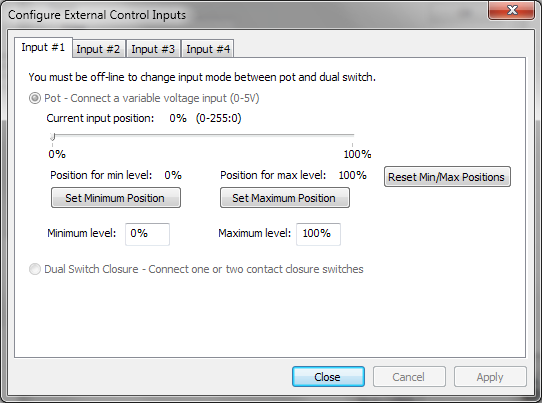
- Configure External Control Inputs...- Each external control input can be configured to accept either a dual switch closure or a single potentiometer. The operational mode must first be configured off-line using the Configure External Control Inputs dialog. A potentiometer can be calibrated for maximum travel or scaled while on-line using the Set Minimum Position and Set Maximum Position buttons.
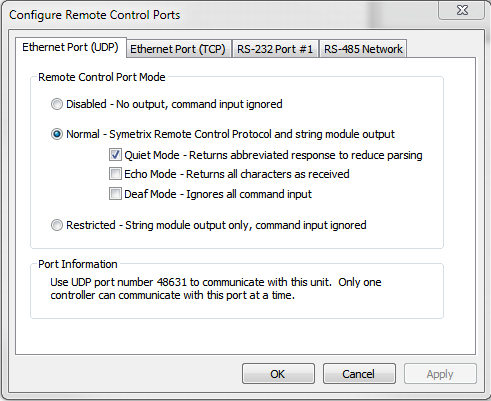
- Configure Remote Control Ports...- Configure your Ethernet, RS-232, and RS-485 ports for third-party control.
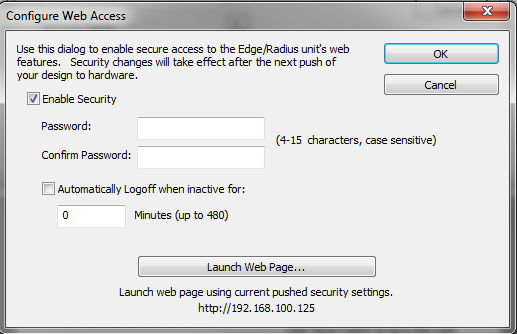
- Configure Web Access...- Security can be enable by checking the "Enable Security" check box to prevent unauthorized access to the Radius AEC Web Interface. Type in a password and confirm it. Check the "Automatically Logoff when inactive for:" box and enter the amount of minutes to wait before being automatically logged off. Click the "Launch Web Page..." button to launch the interface using current pushed security settings. For information about the web interface click here.
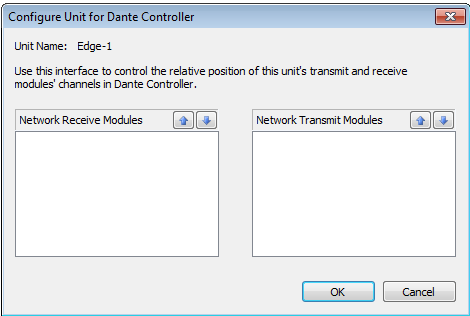
- Configure for Dante Controller...- Opens the Configure Unit for Dante Controller dialog. This dialog allows the user to change the relative position of the units' network transmit and receive module channels in Dante Controller. This button will be greyed out and inaccessible for units without a Dante card.
-
View Settings- When either Show Physical I/O or Show Network I/O check box is checked, the unit module in the Site View will show the corresponding connections.
-
Colors-The text color and background color for the unit module can be customized. To save custom color settings made here as defaults for future units, click the Save Colors button.