W Series Remote Hardware
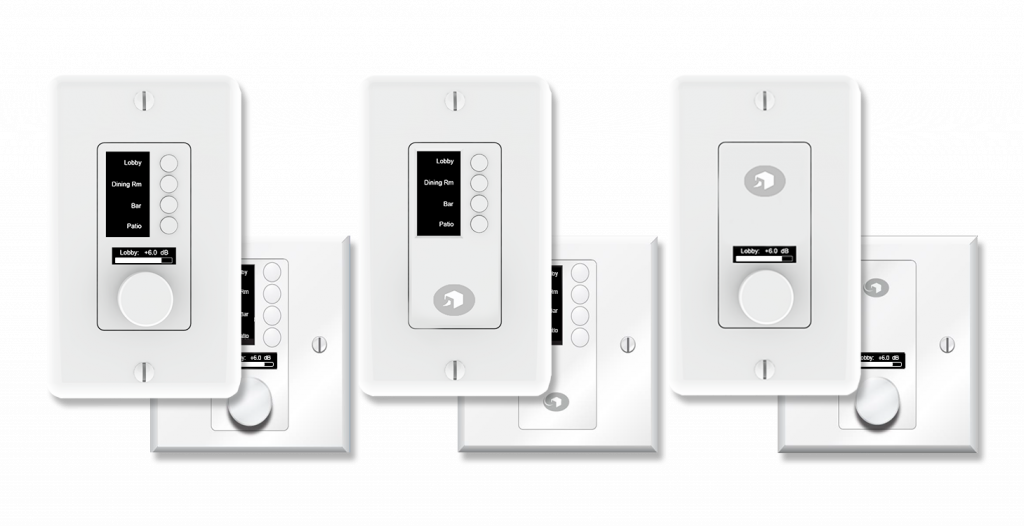
Product Highlights
-
Simple deployment with standard PoE switch
-
Mounts in a 1.375 inch, or 35mm, shallow-depth electrical box
-
Flexible display accommodates the use of Symbols to simplify operation and overcome language barriers
-
Simple and easy end user control
-
Dramatically increases the number of control devices that can be added to a Symetrix based system
-
Perfect for Houses of Worship, Hospitality, Education, Performance/Live Sound and Conferencing
-
Available in 3 different configurations
Specifications
| W1 | W2 | W3 | W4 | |
| Control | ||||
| User Interface | One rotary encoder with push-button knob | 4 push-button switches | One rotary encoder with push-button knob and 4 push-button switches | One rotary encoder with push-button knob and 9 push-button switches |
| General | ||||
| Form Factor | 1 or 2-gang US or EU wall mount. | 1 or 2-gang US or EU wall mount. | 1 or 2-gang US or EU wall mount. | 1 or 2-gang US or EU wall mount. |
| Device Width (US) | 1.78” Single Gang Decora | 1.78” Single Gang Decora | 1.78” Single Gang Decora | 3.6” Dual Gang Decora |
| Device Depth (US) | 1.34" | 1.34" | 1.34" | 1.34" |
| Device Height (US) | 4.25" | 4.25" | 4.25" | 4.25" |
| Display | ||||
| Type | High Contrast OLED | High Contrast OLED | High Contrast OLEDs | High Contrast OLEDs |
| Viewable Area | .91”( 23.11mm) Diagonal | 1.3” (33.02mm) Diagonal | .91” ( 23.11mm) and 1.3” (33.02mm) Diagonal | .9”1 and 2x 1.3” (33.02mm) Diagonal |
| Orientation | Vertical | Vertical | Vertical | Vertical |
| System | ||||
| Physical Network Layer | Ethernet | Ethernet | Ethernet | Ethernet |
| Ethernet Cable | Standard CAT5e/6, maximum device-to-device length = 100 meters. | Standard CAT5e/6, maximum device-to-device length = 100 meters. | Standard CAT5e/6, maximum device-to-device length = 100 meters. | Standard CAT5e/6, maximum device-to-device length = 100 meters. |
| Compatibility | Symetrix Composer-managed products. | Symetrix Composer-managed products. | Symetrix Composer-managed products. | Symetrix Composer-managed products. |
Mechanical Data
Electrical
PoE IEEE 802.3af Class 0, 15 Watts maximum. No line voltage switching required.
Ventilation
Maximum recommended ambient operating temperature is 50 C / 122 F. Avoid prolonged exposure to direct sunlight or strong ultraviolet light.
Hardware Installation
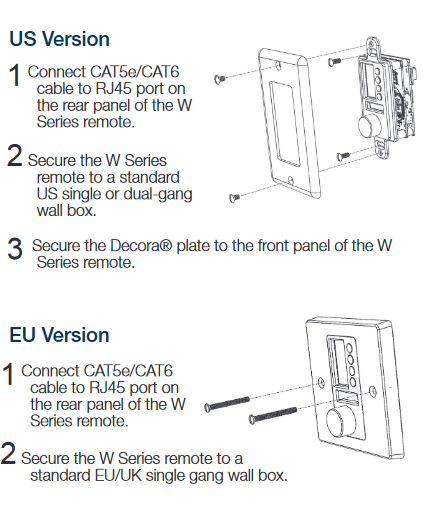
Physical Installation
Network Setup
About DHCP
The W Series remote boots with DHCP enabled by default. This means that as soon as you connect it to a network, it will look for a DHCP server in order to obtain an IP address. If a DHCP server is present, the W Series remote will obtain an IP address from it. This process may take several minutes. With your PC attached to the same network, and thus also getting it’s IP address from the same DHCP server, the PC will be able to communicate with the W series remote. If your network does not have a DHCP server, the W Series remote will not be able to obtain an IP address. While waiting, the W Series remote will default to a private IP address in the range of 169.254.x.x where x.x is the last four alphanumeric characters of W Series remote’s MAC address (MAC address hex value is converted to decimal for IP address). W Series remote’s MAC address can be found on a sticker on the bottom of the hardware. When there is no DHCP server present to assign IP addresses to a W Series remote or your PC, you may need to configure your PC with a static IP in the range of 169.254.x.x with a Subnet Mask of 255.255.0.0 in order to communicate with the W Series remote in a direct connect mode. However, if your PC is using the default network settings, it should also automatically self-assign a similar private IP address in the range of 169.254.x.x, and if this is the case, you should be able to connect to the W Series remote directly. Even if the PC’s default settings have been changed; the W Series remote will try to establish communications by setting up appropriate routing table entries to reach devices with 169.254.x.x addresses. Connecting to Server D100, Radius NX, Radius, Prism, and Edge from a host computer on the same LAN. The Server D100, Radius NX, Radius, Prism, Edge, and the host computer require the following 3 items:
1. IP Address - The unique address of a node on a network.
2. Subnet Mask - Configuration that defines which IP addresses are included in a particular subnet.
3. Default Gateway (optional) - The IP address of a device that routes traffic from one subnet to another.
(This is only needed when the PC and Server D100, Radius NX, Radius, Prism, or Edge are on different subnets). If you are putting Server D100, Radius NX, Radius, Prism, or Edge on an existing network, a network administrator will be able to provide the above information or it may be provided automatically by a DHCP server. For security reasons, it is not recommended to put Server D100, Radius NX, Radius, Prism, and Edge directly on the Internet. If you do, a network administrator or your Internet Service Provider can provide the above information. If you are on your own private network, directly or indirectly connected to Server D100, Radius, Prism, or Edge, you may allow Server D100, Radius NX, Radius, Prism, or Edge to choose an automatic IP address or you may choose to assign it a static IP address. If you are building your own separate network with static assigned addresses, you may consider using an IP Address from one of the ”Private-Use” networks noted in RFC-1918:
1. 172.16.0.0/12 = IP Addresses 172.16.0.1 through 172.31.254.254 and a Subnet Mask of 255.240.0.0
2. 192.168.0.0/16 = IP Addresses 192.168.0.1 through 192.168.254.254 and a Subnet Mask of 255.255.0.0
3. 10.0.0.0/8 = IP Addresses 10.0.0.1 through ___10.254.254.254 and a Subnet Mask of 255.255.0.0
Locating Hardware
Discovery of, and connection to, the W Series remote hardware is done with the Locate Hardware dialog found under the Hardware menu or by clicking the Locate Hardware icon in the tool bar or on a particular W Series remote unit itself. IP Configuration with Composer ™. The Locate Hardware dialog will scan the network and list available units. Select the W Series remote unit you wish to assign an IP address to and click the Properties button. If you wish to assign the W Series remote a static IP address, select “Use the following IP address” and enter the appropriate IP address, Subnet mask and Gateway. Click OK when finished. Now, back in the locate hardware dialog, ensure the W Series remote device is selected and click “Select Hardware Unit” to use this W Series remote hardware in your Site File. Close the Locate Hardware dialog.