Vias
Summary
Via modules allow audio to be bussed to multiple sources in a site file and also allow for connection points to be made without having to draw the wires through the entire design. The major benefits are cleaner, less cluttered site files and less programming time. Via modules are available in the Toolkit for Configuration, Design, or the Super-Module views.
Using Vias
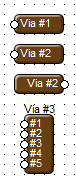
The Via modules can be found at the highest level of the Toolkit listed directly under "Settings Library" in the Configuration and Design Views. You can also add a new Via Pair by selecting "Place New Via Pair from the ToolKit which will add a new via input and output and you can add a via with multiple channels and name each channel individually.
A Via's module automatically re-sizes to fit the name displayed inside the module. If the name is changed, it will always expand/contract on the side without a wiring node.
Vias cannot connect in or out of a Super-module between units even if they have the same name. newly placed Vias will have a unique default name applied. The name can be any non-blank Unicode text up to (31) characters.
By Holding down Ctrl and dragging in a via, it will automatically reverse it's orientation.
Vias will consume no DSP power and do not show up on reports. Each parameter which can be adjusted is adjusted through the Properties dialog available through the right click menu.
Vias will act as wired connections for all Analyze functions. The connection of two outputs using Vias will cause an Analyze error if configured to report them. Via's with no connecting wries will not generate and Analyze error and are essentially like and isolated wire segment.
Note: Do not feed the output of Via modules which are carrying control signals to loudspeaker outputs on your DSP. Control signals do not posses the same harmonic properties as audio signals and are likely to cause damage to loudspeaker components if they are amplified and replicated by the sound system.
Right-Click Menu
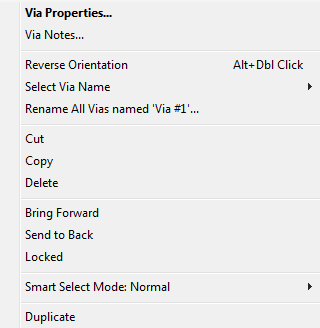
Via Properties... -Opens the Via Properties menu.
Via Notes... -Opens the Notes dialog box allowing you to enter or edit notes for the object.
Reverse Orientation -Inverts the direction the Via faces and whether it's an input or output.
Select Via Name -Allows you to select the name of the Via by listing all of the Via names in the site file.
Rename All Vias named 'Via #1'...- Renames all Vias that are the same name as the selected Via.
Cut/Copy/Delete- Same basic edit commands as found under the Edit Menu.
Bring Forward/Send to Back- These commands allow you to easily layer or sort layers of objects.
Locked- Disallows moving the object on the page.
Smart Select Mode- Switches between the three selection modes. (Modes detailed here.)
Duplicate- Duplicates the currently selected object, also found under the edit menu.
Properties
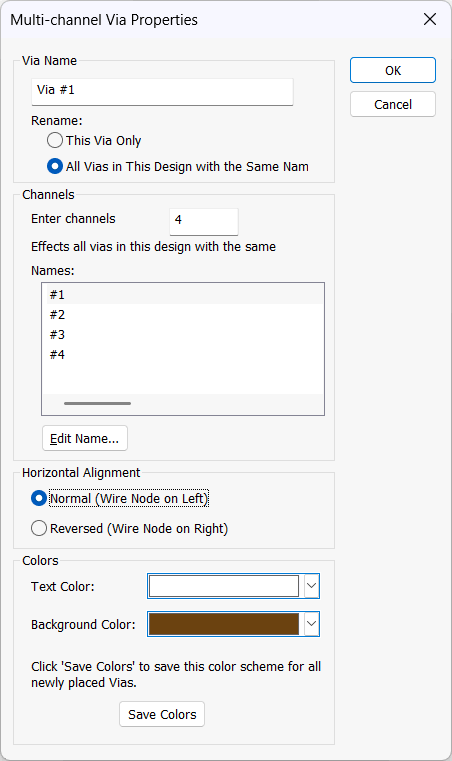
Via Name- Edit the Via name here.
Rename- Change the name of "This Via Only" or "All Vias in This Design with the Same Name".
Channels
Enter channels (1-64): - Type in how many channels the Via should have.
Names:
Edit Name... -Change the selected channel name.
Horizontal Alignment -Choose Normal (Wire Node on Left) or Reversed (Wire Node on Right)..
Colors
Text Color... - Change the font color.
Background Color - Change the background color.
Save Colors -Click this button to save your color scheme.
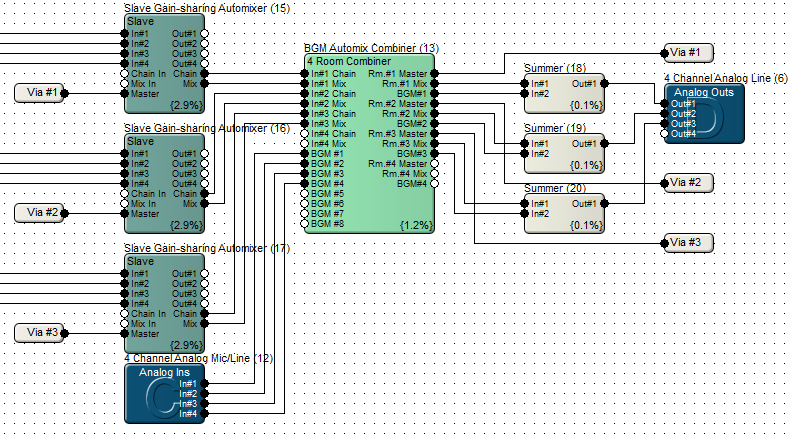
Example