Network Configuration
Connecting to a unit from a Host Computer on the same LAN
Connecting to a Unit through Firewall/VPN
Configuring your computer for a network connection: Windows 10
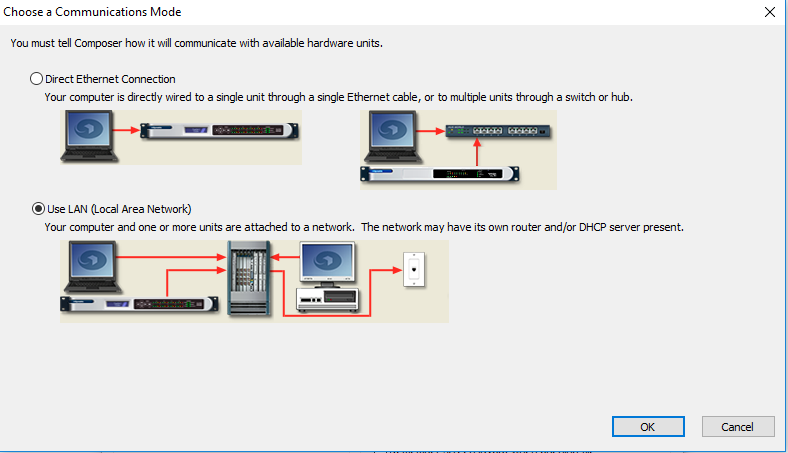
The Symetrix units are setup and controlled by a host computer via Ethernet. This requires the host computer to be connected to the unit directly via a standard CAT5 Ethernet cable, indirectly via an Ethernet switch, or via an existing Ethernet network.
General Notes
-
The unit boots up with DHCP enabled by default. This means that as soon as you connect it to a network, it will look for a DHCP server in order to obtain an IP address. If a DHCP server is present, the unit will get its IP address from it. This process may take several minutes. With your PC attached to the same network and thus getting its IP address from the same DHCP server, all will be ready to go.
-
If your network does not have a DHCP server, the unit will not be able to obtain an IP address. While waiting, the unit will default to a private IP address in the range of 169.254.x.x where x.x is the last four alphanumeric characters of the unit’s MAC address. The unit’s MAC address can be found on a sticker on the bottom of the unit or within the front panel System menu. When there is no DHCP server present to assign IP addresses to either the unit or your PC, you may need to configure your PC with a static IP in the range of 169.254.x.x with a Subnet Mask of 255.255.0.0 in order to communicate with the unit in a direct connect mode. However, if your PC is using the default network settings, it should also have automatically self-assigned a similar private IP address in the range of 169.254.x.x, and if this is the case, you should be able to connect to the unit directly. Even if the PC's default settings have been changed, the unit will try to establish communications by setting up appropriate routing table entries to reach devices with 169.254.x.x addresses.
-
In the case of the first two methods (direct connection and indirect connection), the unit software will attempt to set-up appropriate routing table entries for a seamless connection regardless of the IP addresses of your PC and unit. However, under Windows® Vista, administrative privileges are required to allow the unit software to modify the routing table. For best results, launch the unit software while logged in as an administrator, or choose to run the software as an administrator.Note: To run a program as the Administrator under Vista, right click on the program's icon or shortcut and choose "Run as administrator".
-
The unit will display its current IP address, subnet mask, and gateway as well as other useful information on the front panel display when in System Mode. To enter System Mode, hold down the Menu button for 5 seconds. Then the up and down arrow keys can be used to move between various displays. This information may be useful for troubleshooting.
Network configuration of the unit:
Connecting to the unit from a host computer on the same LAN
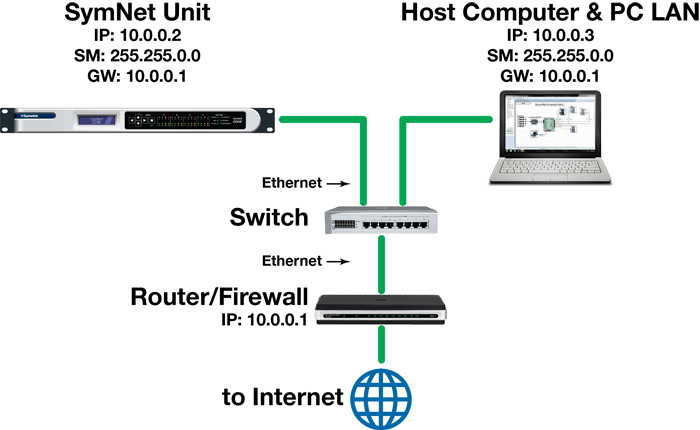
Both the unit and the host computer require the following 3 items:
-
IP Address - The unique address of a node on a network.
-
Subnet Mask - Configuration that defines which IP Addresses are included in a particular subnet.
-
Default Gateway (optional) - The IP address of a device that routes traffic from one subnet to another. (This is only needed when the PC and unit are on different subnets).
If you are putting the unit on an existing network, a network administrator will be able to provide the above information or it may have been provided automatically by a DHCP server. For security reasons, it is not recommended to put the unit directly on the Internet. If you do, a network administrator or your Internet Service Provider can provide the above information.
If you are on your own private network, directly or indirectly connected to the unit, you may allow the unit to choose an automatic IP address or you may choose to assign it a static IP address. If you are building your own separate network with static assigned addresses, you may consider using an IP Address from one of the ”Private-Use” networks noted in RFC-1918:
-
172.16.0.0/12 = IP Addresses 172.16.0.1 through 172.31.254.254 and a Subnet Mask of 255.240.0.0
-
192.168.0.0/16 = IP Addresses 192.168.0.1 through 192.168.254.254 and a Subnet Mask of 255.255.0.0
-
10.0.0.0/8 = IP Addresses 10.0.0.1 through 10.254.254.254 and a Subnet Mask of 255.255.0.0
Connecting to the unit through a Firewall/VPN
We have successfully tested control of a unit through a firewall and VPN, but are unable to guarantee performance of these types of connections at this time. Configuration instructions are specific to each firewall and VPN, so specifics are not available. Additionally, wireless communications are also not guaranteed, though have also been successfully tested.
Configuring your computer for a network connection: Windows 10
-
Select “Start->Control Panel”.
-
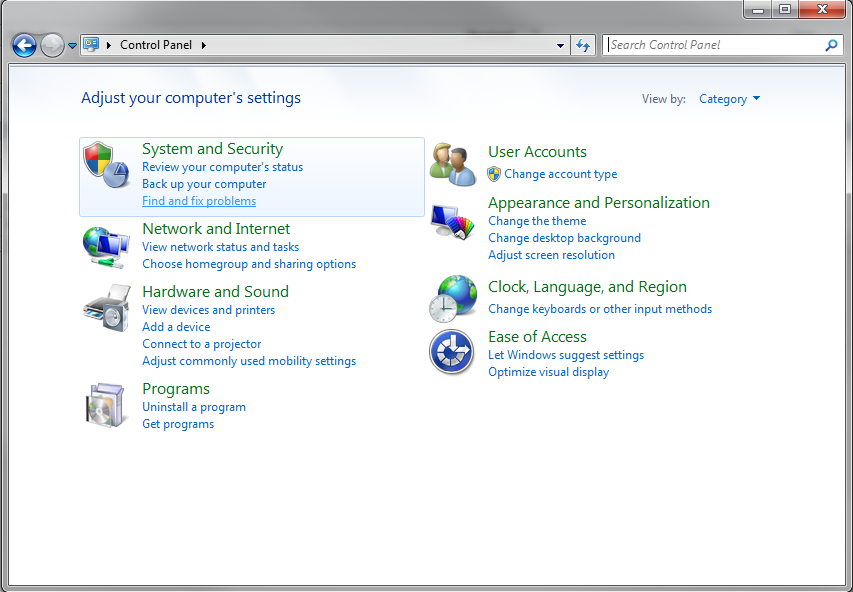
Select “Network and Internet".
-
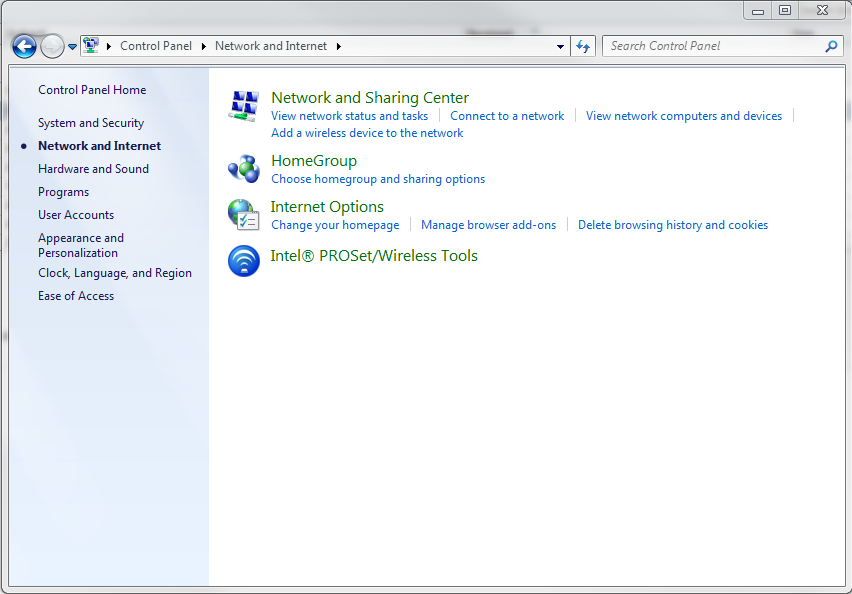
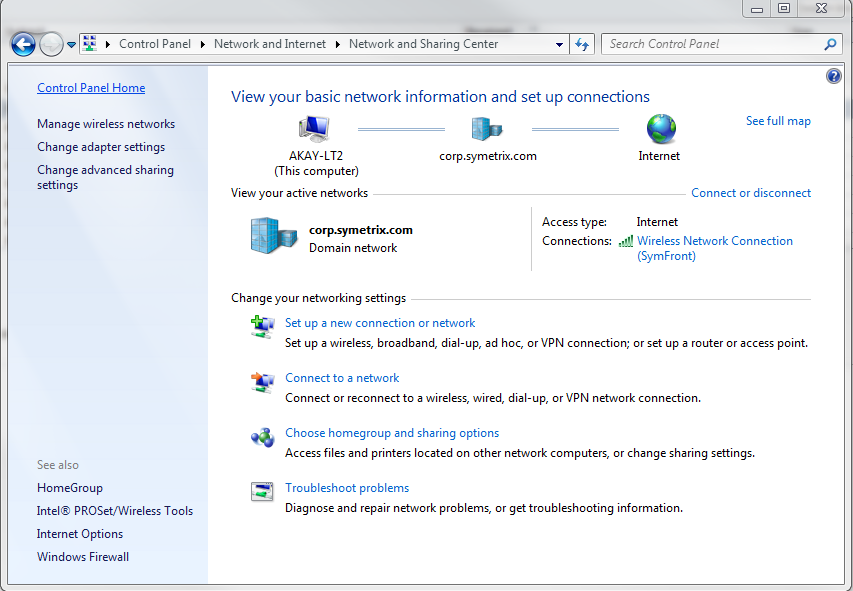
Open the “Network and Sharing Center”.
-
Choose “Change Adapter Settings” on the left.
-
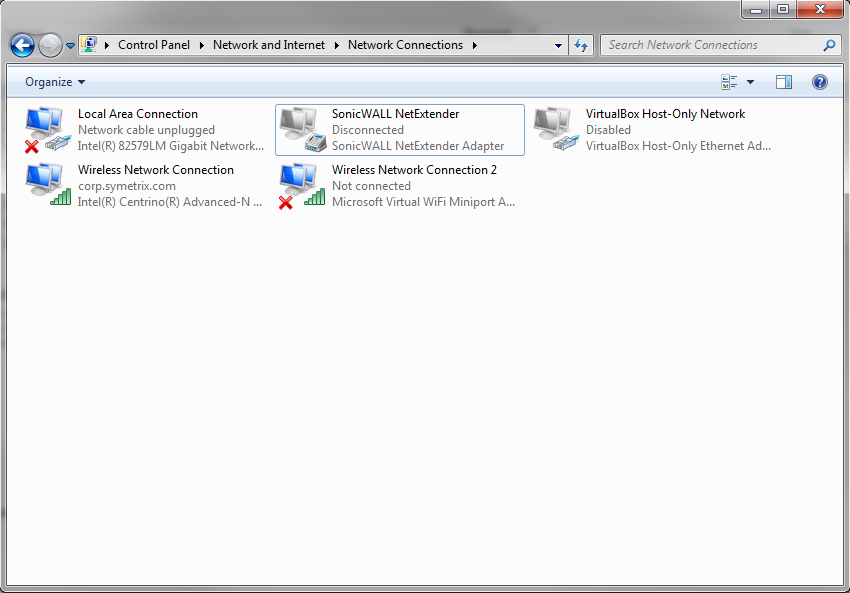
Right-click the desired connection and choose “Properties”.
-
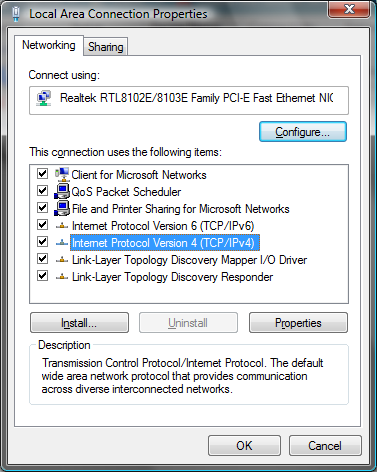
Under “This connection uses the following items”, select “Internet Protocol Version 4 (TCP/IPv4)” and press “Properties”.
-
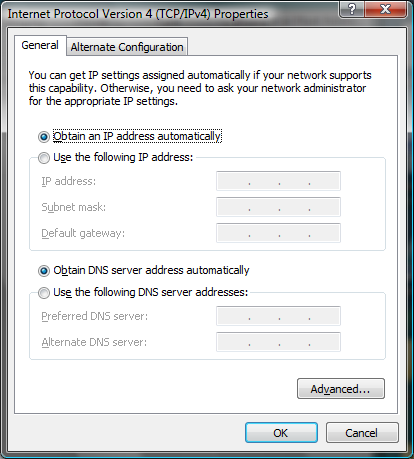
On the “General” tab, you may select “Use the following IPv4 address” to enter in the appropriate information if using static assigned addresses. (DNS server is not required for connection to a unit). Otherwise, leave set to “Obtain an IPv4 address automatically” if using DHCP. Press OK to close.
-
Repeat steps 6 and 7 for “Internet Protocol Version 6 (TCP/IPv6)” if on an IPv6 network. Consult your IT staff if you are unsure.
-
Press OK to save and “Close” to exit out of the “Local Area Connection Properties”.
Note: Typically, only Administrators or users belonging to the Network Configuration Operators group can alter networking configurations in Windows 10.
For more information about configuring the host computer, visit http://www.microsoft.com.
Once you have completed the setup of your network and any network hardware/interfaces, move on to explore the Software.