Adding Third-Party Dante Devices to the User Library
Symetrix Composer contains a list of supported third-party Dante devices. When these supported devices are added to a site file, Composer can create transmit/receive subscriptions as well as provide control for some devices.
The User Library is located in the Third-party Dante Devices section of the Toolkit in Device View. Any third-party Dante device can be added to the User Library. Once a device is added to the User Library, Composer will treat it as a supported third-party Dante device.
There are two methods to add a third-party Dante device to the User Library:
- Browse Dante Network
- Import XML File
Browse Dante Network
Here are instructions to add a third-party Dante device to the User Library by browsing the Dante network:
(This example uses a Radius AEC and a Windows PC running Dante Via)
1. From the Toolkit, add a Radius AEC to the Site View page.
2. Next from the Toolkit, expand Third-party Dante Devices.
3. Expand the User Library and add a New Dante Device to the Site View page. The Dante Device User Library Manager window will open. 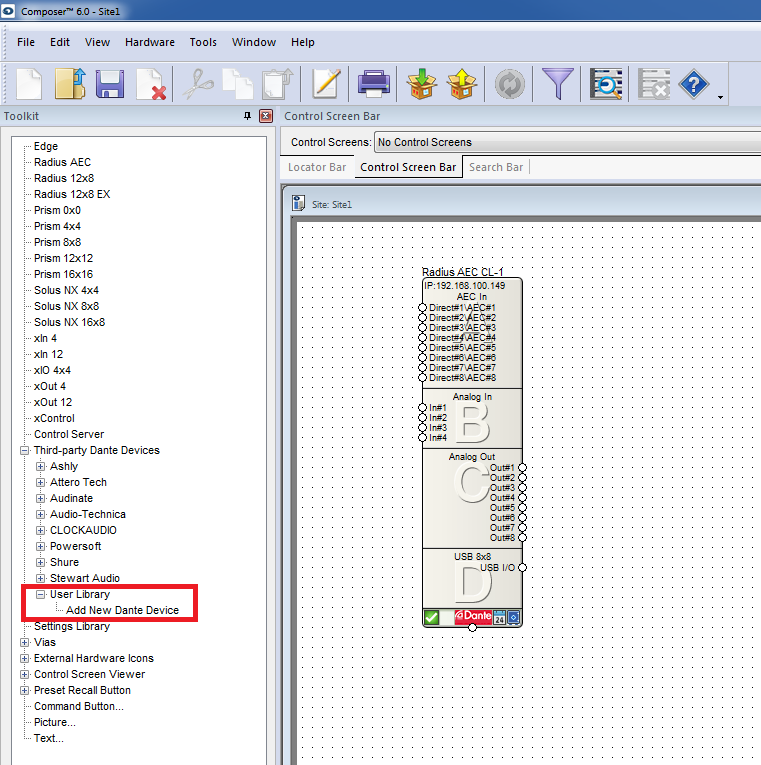
4. Click the “Browse Network” button.
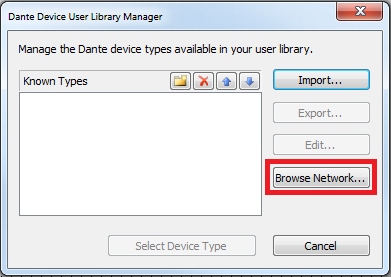
5. The Locate Hardware window will open and display all available Dante devices on that network.
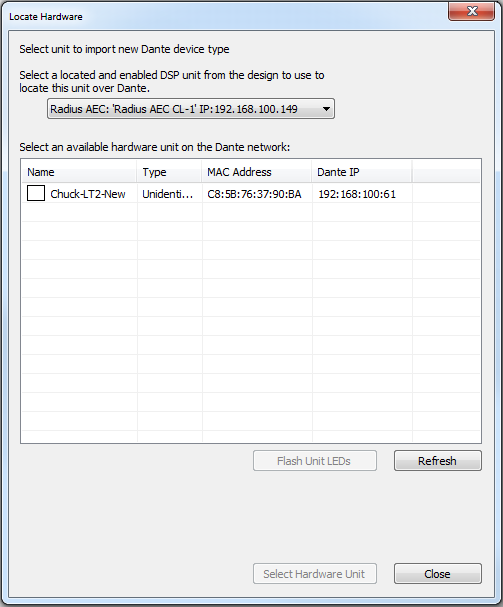
6. Select the desired Dante device, then click the “Select Hardware Unit” button.
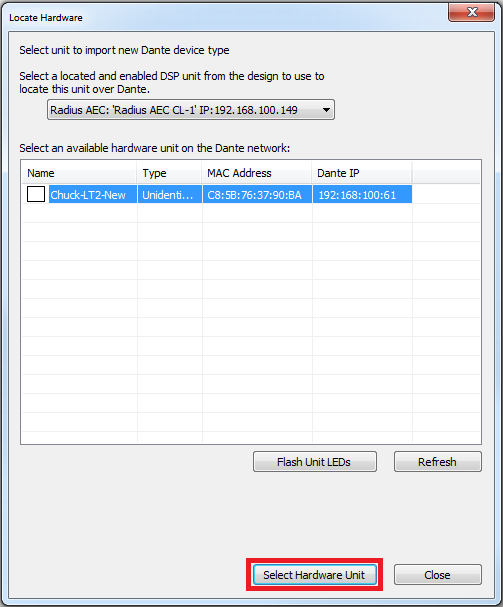
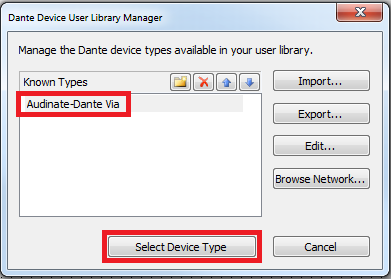
7. The Dante Device User Library Manager will now list that Dante device. Select the desired Dante device and click the “Select Device Type” button. This will add the device to the site view page.
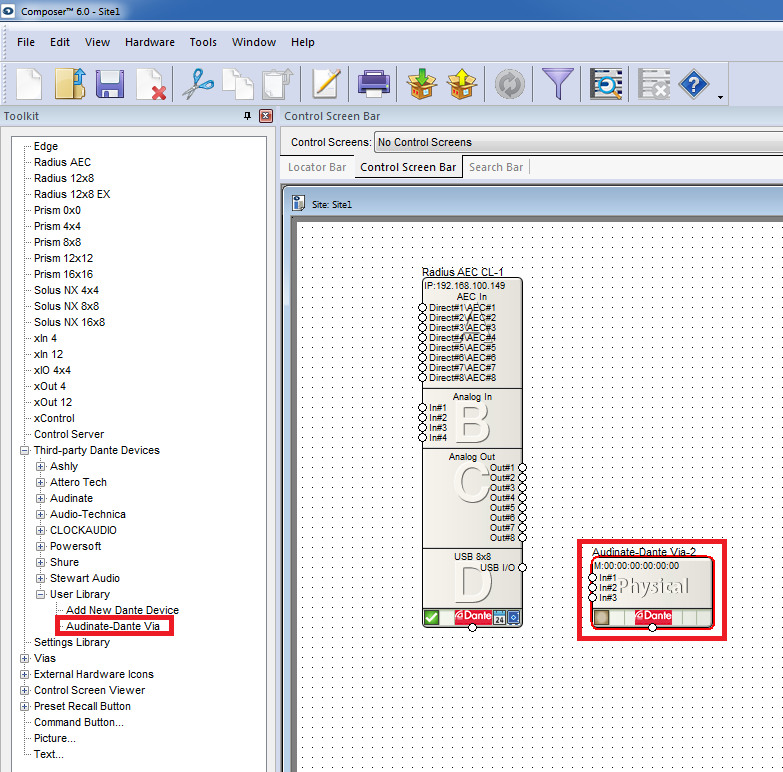
8. Once added to the library, these devices are available to add to any site file. Open the Design View page by double-clicking the Radius AEC.
9. From the Toolkit, expand Network I/O Modules, then expand Receive Modules.
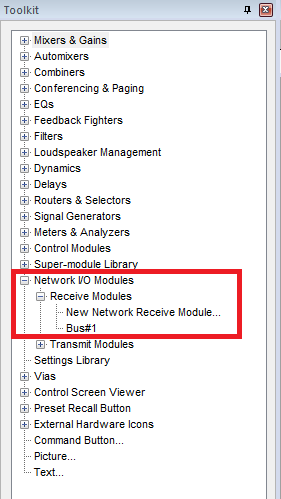
10. Bus#1 is automatically created and available. Add Bus#1 to the Design View page.
Note: Whenever a Symetrix Dante-enabled Analog I/O Expander, third-party Dante device, or transmit bus are added to a site file, a receive bus is automatically created, and available from the Toolkit.
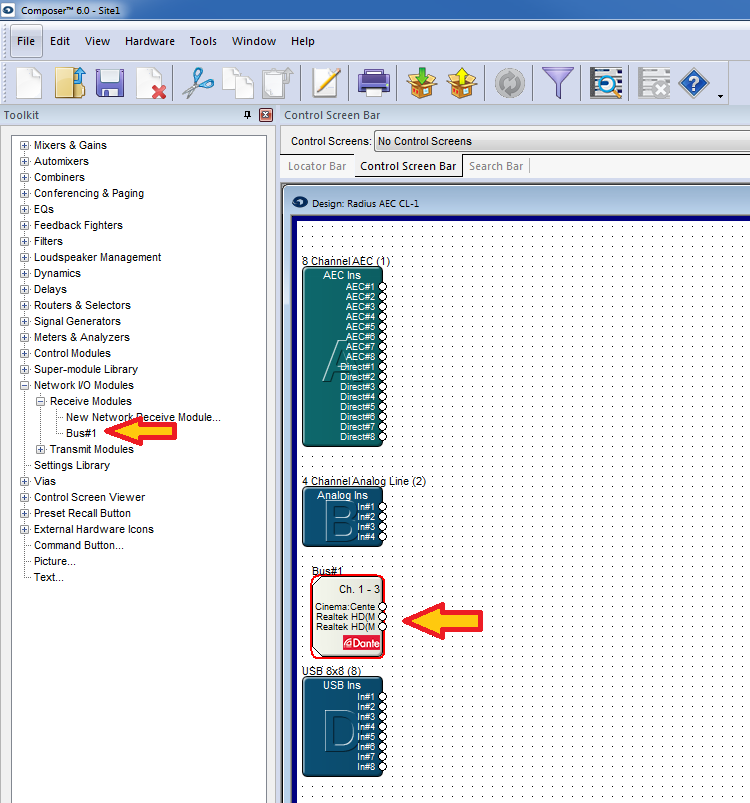
11. Push the site file and Composer will make the Dante subscriptions for these channels.
Import XML File
Here are instructions to add a third-party Dante device to the User Library by importing an XML file:
(This example uses a Radius AEC and a RDL DD-BN31 wall-mounted Dante interface)
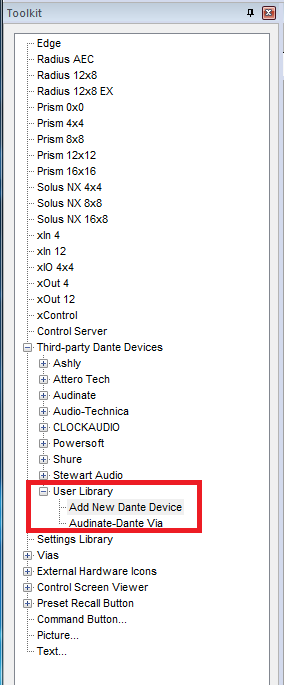
1. From the Toolkit, expand Third-party Dante Devices.
2. Expand the User Library and add a New Dante Device to the Site View page. The Dante Device User Library Manager window will open.
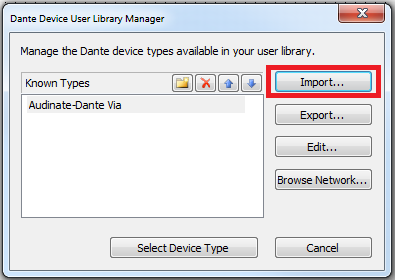
3. Click the “Import” button.
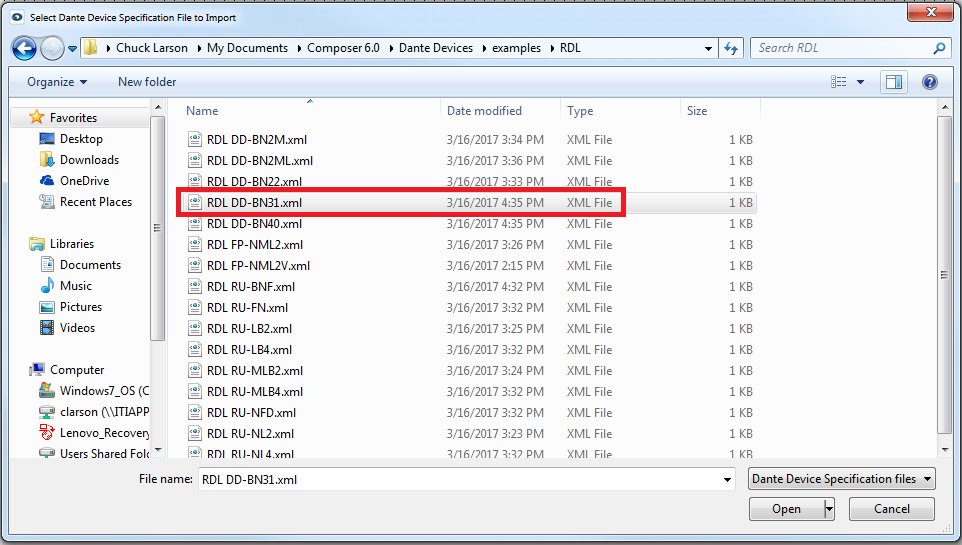
4. Navigate to the XML file to be imported.
5. Select the XML file, click “Open”.
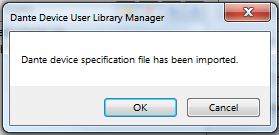
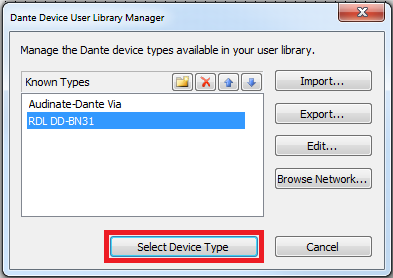
6. Click OK when the Select Dante Device Specification File to Import window opens, confirming the file has been imported. The RDL DD-BN31 device is now available from the User Library.
7. Select the device from the list of Known Types; click the “Select Device Type” button. The RDL DD-BN31 will be added to the site file and is now available from the Toolkit.
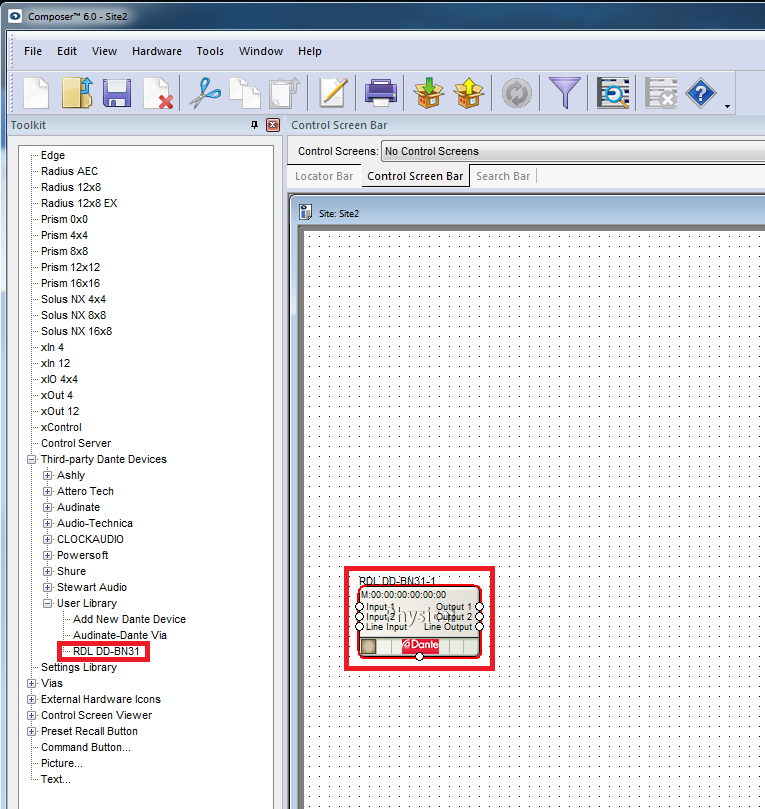
8. From the Toolkit, add a Radius AEC to the Site View page.
9. Open the Design View page by double-clicking the Radius AEC.
10. From the Toolkit, expand Network I/O Modules, then expand Receive Modules.
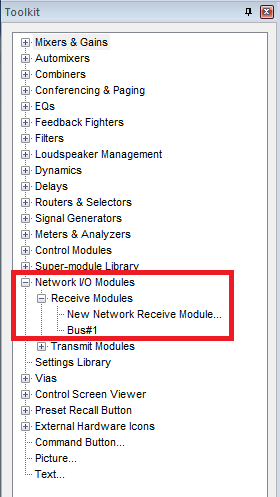
11. Bus#1 is automatically created and available. Add Bus#1 to the Design View page.
Note: Whenever a Symetrix Dante-enabled Analog I/O Expander, third-party Dante device, or transmit bus are added to a site file, a receive bus is automatically created, and available from the Toolkit.
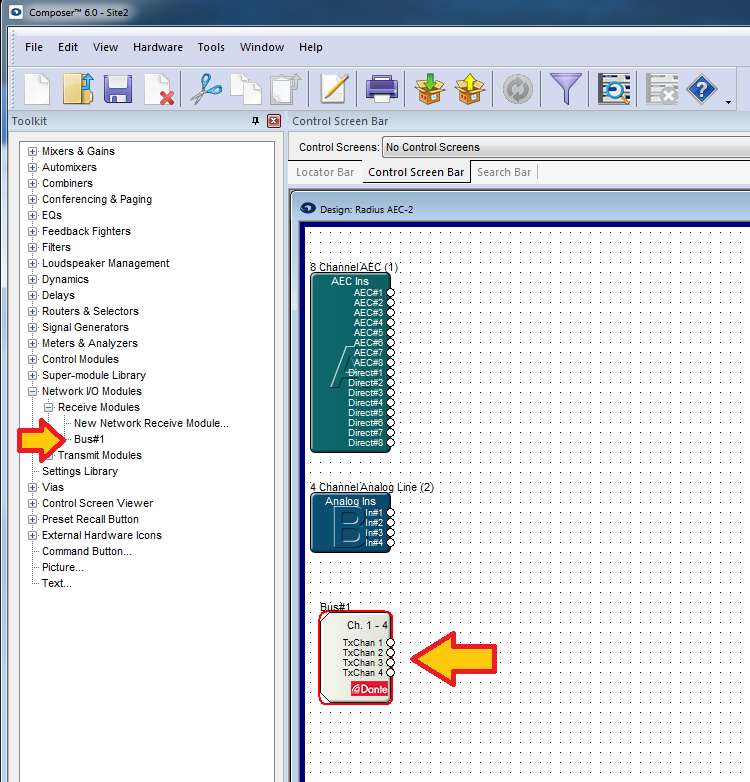
12. Push the site file and Composer will make the Dante subscriptions for these channels.