Unit to PC Connection
What to do if the Symetrix unit and PC can't see each other
In a worst-case scenario, getting the host machine and the unit to map to the same network is not terribly difficult, but requires some PC settings and a reinitialization to the factory default state of the unit. If it becomes necessary to re-initialize the unit, all user-defined settings and configurations will be lost, so be sure to back-up the unit's files.
Reinitializing the unit
The main advantage of resetting the Symetrix unit to a factory default state is that it will re-enable DHCP (Dynamic Host Control Protocol) on the unit, thereby automatically assigning a reliable and predictable IP address in the 169.x.x.x base.
The factory reset button is located just to the right of the unit's RS-232 port. Using a pen or a paper clip, depress this button and continue to hold it down. While doing this, unplug the unit, wait about 10 seconds and then plug the unit back in... continue to keep the reset button depressed until the unit has gone through a "light show," where all of the LEDs on the unit briefly light in sequence. Once the light show stops, release the reset button. The unit is now returned to the state it was in when it arrived from the factory.
Once the unit has been restored to factory defaults, the first order of business should be to locate the unit and upgrade the firmware to the most recent version supplied with the current Composer release.
Resetting the PC's network configuration
Start by directly plugging the host computer directly to the Ethernet port of the unit. At the host computer, click Start > Run... type "cmd" (without the quotes) in the Run field and press Enter.
Once the DOS window appears, type "ipconfig /release" and press Enter (this clears current configurations for the network unit). Windows will display your IP settings with all ZEROES in the address fields. Then type "ipconfig /renew" and hit Enter (this causes Windows to reassess networking topology and assign itself a default IP address). By doing this, we level the playing field for the host computer and the unit. Now, the direct connection between the two should result in an effortless discovery / connection process.
If after doing this the host IP address is not a 169.x.x.x address, further steps can be taken to make it so.
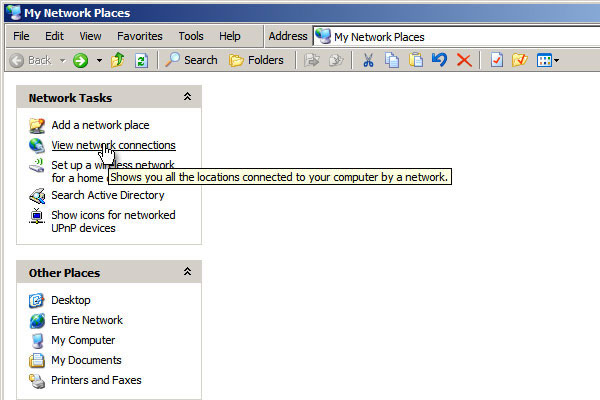
Click Start and choose My Network Places. In the column at left, click View Network Connections.
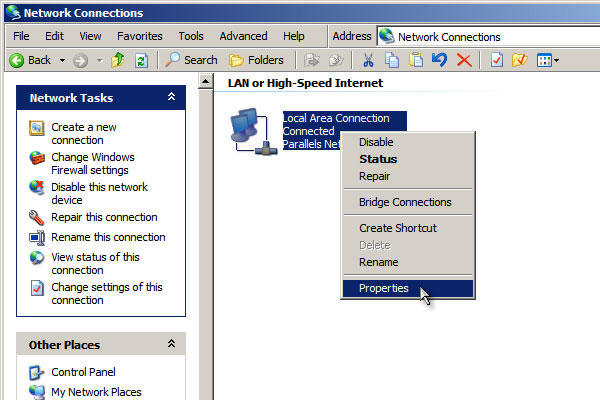
Once the Network Connections are displayed, right-click the desired connection and choose Properties from the dropdown.
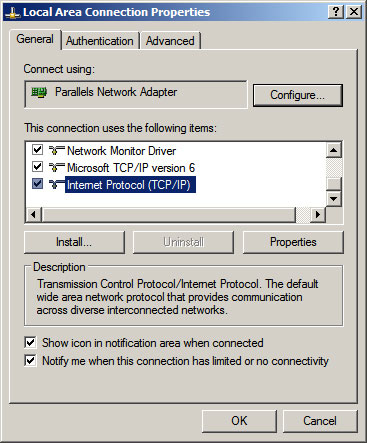
When the Local Area Connection Properties window appears, scroll to the bottom of the list, highlight Internet Protocol (TCP/IP) and click the Properties button.
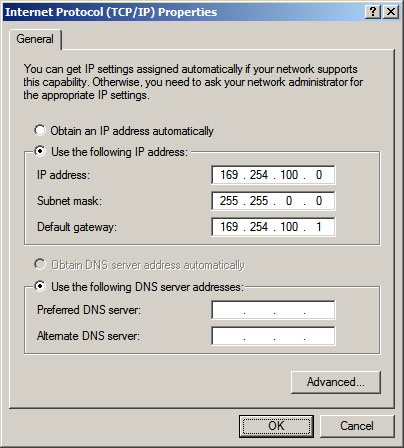
The user now has the option to declare a specific IP address, Subnet Mask and Default Gateway. To do this, make sure the "Use the following IP address" option is chosen and enter the information depicted below: